
 Emmanuel John I'm a full-stack software developer, mentor, and writer. I am an open source enthusiast. In my spare time, I enjoy watching sci-fi movies and cheering for Arsenal FC. Table of contents
 - What Vite+ includes
- When Vite+ makes sense
- Prerequisites
- Installing Vite+
- Creating a project with Vite+
- Running the dev server
- Configuring Vite+ in
vite.config.ts - Adding formatting with Oxfmt
- Adding linting with Oxlint
- Adding tests with Vitest
- Running all checks with
vp check - Using staged checks before commit
- Migrating an existing Vite project
- Managing Node.js versions with
vp env - Vite+ vs. a traditional frontend toolchain
- Current limitations to consider
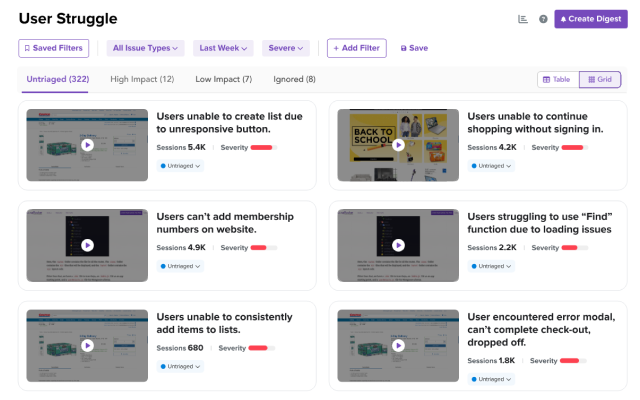 Introducing Galileo AI LogRocket’s Galileo AI watches every session, surfacing impactful user struggle and key behavior patterns. LEARN MORE
See how LogRocket's Galileo AI surfaces the most severe issues for you
No signup required
Check it outModern JavaScript projects often depend on a stack of separate tools: Vite for local development and builds, ESLint for linting, Prettier for formatting, Vitest for testing, a Node.js version manager, and package scripts to hold everything together.

That setup works, but it creates coordination overhead. Each tool has its own config file, defaults, plugin model, release cycle, and failure modes. As projects grow, the tooling itself can become another maintenance surface.
Vite+ is a free, open-source CLI from VoidZero that consolidates much of that workflow behind a single command-line tool: vp. It combines Vite, Vitest, Oxlint, Oxfmt, Rolldown, tsdown, Vite Task, and Node.js runtime management into one developer workflow.
This does not mean every project should immediately replace its existing setup. Vite+ is still early, and teams with deep ESLint, Prettier, monorepo, or framework-specific requirements should test migration carefully. But for teams already using Vite, or starting a new Vite-based project, Vite+ is worth understanding because it points toward a more integrated JavaScript toolchain.
For background on Vite itself, see LogRocket’s Vite adoption guide.
🚀 Sign up for The Replay newsletter
The Replay is a weekly newsletter for dev and engineering leaders.
Delivered once a week, it's your curated guide to the most important conversations around frontend dev, emerging AI tools, and the state of modern software.
What Vite+ includes
Vite+ is designed to replace several common local development commands with a single vp workflow.
| Tool or workflow | What Vite+ provides | What it can replace or consolidate |
|---|---|---|
| Vite | Dev server and production builds | Separate Vite scripts in package.json |
| Rolldown | Production bundling through Vite 8 | Rollup-oriented build configuration in many Vite projects |
| Oxlint | Fast JavaScript and TypeScript linting | Many ESLint use cases |
| Oxfmt | Code formatting | Many Prettier use cases |
| Vitest | Unit and integration testing | Separate Vitest setup |
| Vite Task | Monorepo task running and caching | Some Turborepo-style workflow needs |
vp env | Node.js version management | Tools such as NVM or FNM for project-level Node pinning |
vp check | Formatting, linting, and type checks | Separate format, lint, and type-check scripts |
The key advantage is not just speed. It is consistency. Instead of maintaining separate config files for every workflow concern, Vite+ centralizes more of the setup in vite.config.ts.
When Vite+ makes sense
Vite+ is a strong fit when your team wants a standard workflow across projects and is already comfortable with the Vite ecosystem.
| Use Vite+ when… | Be cautious when… |
|---|---|
| You are starting a new Vite-based app | You are maintaining a large production app with complex ESLint plugin requirements |
| You want one command for format, lint, and type checks | Your current Prettier or ESLint setup depends on unsupported edge cases |
| You want built-in Node.js version pinning | Your organization already standardizes on another runtime manager |
| You want a simpler monorepo task workflow | You already rely heavily on Turborepo, Nx, or custom task orchestration |
| You are experimenting with AI-assisted workflows | You need fully mature, battle-tested tooling for regulated production environments |
This matters because Vite+ is not only a developer-experience tool. It also reflects a broader shift in frontend tooling: fewer separate packages, more integrated toolchains, and more workflows designed for both human developers and AI coding agents.
That shift connects directly to the broader problem of frontend tool overload.
Prerequisites
To follow along, you need:
- Basic command-line familiarity
- A working Node.js installation
- A terminal on macOS, Linux, or Windows
- An existing Vite project, if you want to test migration
You do not need ESLint, Prettier, Vitest, NVM, or FNM installed globally to try the core Vite+ workflow.
One important version note: Vite 8 requires Node.js 20.19+ or 22.12+. If you are using an older Node.js version, update before testing Vite+.
Installing Vite+
Vite+ installs as a single binary named vp.
On macOS or Linux, run:
curl -fsSL https://vite.plus | bash
On Windows PowerShell, run:
irm https://vite.plus/ps1 | iex
After installation, restart your terminal and verify that the CLI is available:
vp help
If the command returns the Vite+ help output, the CLI is installed correctly.
Creating a project with Vite+
Vite+ scaffolding is handled through the create command:
vp create
Follow the interactive prompts to choose your framework, template, and package manager.
For this walkthrough, use a Vite React project. If you want a deeper React-specific setup, LogRocket has a full guide on how to build a React + TypeScript app with Vite.
Depending on your installed Vite+ version, the CLI may also offer configuration for coding agents. This is useful if your team is experimenting with AI-assisted development workflows, but it should be treated as optional configuration rather than a requirement.
If you are using tools like Claude Code, Copilot, or ChatGPT in your development workflow, see LogRocket’s guide to building a spec-first workflow for agentic AI.
Running the dev server
After creating the project, move into the project directory:
cd my-vite-app
Then start the dev server:
vp dev
This gives you the familiar Vite development workflow through the vp command. Instead of remembering whether the project uses npm run dev, pnpm dev, or yarn dev, the team can standardize around the same command.
That consistency becomes more useful as projects grow. A single command surface reduces onboarding friction and makes local setup easier to document.
Configuring Vite+ in vite.config.ts
Vite+ centralizes configuration in vite.config.ts.
Over 200k developers use LogRocket to create better digital experiences
 Learn more →
 A basic Vite+ config can look like this:
import { defineConfig } from 'vite-plus' export default defineConfig({ staged: { '*': 'vp check --fix', }, }) From there, you can add formatting, linting, testing, and task-running options to the same file.
This is the main difference between Vite+ and a traditional frontend setup. Instead of spreading configuration across .eslintrc, .prettierrc, vitest.config.ts, .nvmrc, and package.json, Vite+ moves more of the project workflow into a single typed configuration surface.
Adding formatting with Oxfmt
To configure formatting, add an fmt section to vite.config.ts:
import { defineConfig } from 'vite-plus' export default defineConfig({ staged: { '*': 'vp check --fix', }, fmt: { singleQuote: true, semi: false, }, }) This config tells Oxfmt to use single quotes and omit semicolons.
Run the formatter with:
vp fmt
For many projects, Oxfmt can replace Prettier. The caveat is that formatting is often a team preference issue. Before migrating a production codebase, run Oxfmt on a branch and review the diff to make sure the output matches your team’s expectations.
Adding linting with Oxlint
Next, add linting configuration:
import { defineConfig } from 'vite-plus' export default defineConfig({ staged: { '*': 'vp check --fix', }, fmt: { singleQuote: true, semi: false, }, lint: { ignorePatterns: ['dist/**'], }, }) Oxlint is designed for speed and supports many ESLint-compatible rules. For straightforward JavaScript and TypeScript projects, it can remove a large amount of ESLint setup.
The main limitation is plugin compatibility. If your project depends on niche ESLint plugins, framework-specific linting rules, or custom internal rules, test Oxlint carefully before replacing ESLint entirely.
Adding tests with Vitest
Vite+ also lets you configure Vitest from the same config file:
import { defineConfig } from 'vite-plus' export default defineConfig({ fmt: { singleQuote: true, semi: false, }, lint: { ignorePatterns: ['dist/**'], }, test: { include: ['src/**/*.test.ts'], }, }) This tells Vitest to pick up test files that match the src/**/*.test.ts pattern.
Run tests with:
vp test
Vitest is especially useful for Vite projects because it reuses much of the same mental model and tooling ecosystem. For a broader look at current Vitest capabilities, see LogRocket’s Vitest 4 adoption guide.
Running all checks with vp check
After configuring formatting, linting, and tests, you can run a unified quality check:
vp check
vp check runs formatting, linting, and type checks through one command. This is useful locally, but it is even more useful in CI because the project can standardize around one check command instead of several package scripts.
For example, if you introduce a type error:
const message: string = 123
Then run:
vp check
Vite+ should report the relevant issue in the terminal. If a problem can be fixed automatically, run:
vp check --fix
The important distinction is that --fix cannot fix every problem. It can handle many formatting and linting issues, but it cannot safely repair all type errors or logic bugs. Treat it as an autofix tool, not a substitute for reviewing the code.
Using staged checks before commit
In a traditional setup, teams often use Husky and lint-staged to check changed files before a commit.
Vite+ can consolidate part of that workflow through its staged configuration:
import { defineConfig } from 'vite-plus' export default defineConfig({ staged: { '*.{ts,tsx,js,jsx}': 'vp check --fix', }, }) This config defines what should run against staged files.
The exact Git hook setup depends on your project. The safest framing is that Vite+ gives you the staged-file command and configuration surface; you still need to make sure your repository is configured to run that staged workflow at the right time.
Once configured, this helps prevent avoidable formatting, linting, and type-checking issues from reaching the main branch.
Migrating an existing Vite project
If you already have a Vite project, you can test migration with:
vp migrate
The migration workflow is designed to move Vite+ related configuration into vite.config.ts. According to the Vite+ README, this includes files such as .oxlintrc*, .oxfmtrc*, and lint-staged config.
For a production project, do not treat migration as a one-command final step. Treat it as the beginning of a review:
vp migrate vp check git diff
Then review the generated config, package changes, and formatting diff before merging.
This is especially important if your current project has complex ESLint or Prettier rules. Vite+ can simplify the toolchain, but it may not replicate every plugin behavior or formatting edge case automatically.
Managing Node.js versions with vp env
Vite+ also includes Node.js version management through vp env.
For example, you can pin a supported Node.js version for the project:
vp env pin 22.12.0
This helps keep every developer on the same runtime version. It also reduces the risk of environment-specific bugs, especially when Vite’s Node.js requirements change between major versions.
This can replace separate .nvmrc or FNM workflows for teams that want Vite+ to manage the runtime along with the frontend toolchain.
Vite+ vs. a traditional frontend toolchain
The main reason to try Vite+ is consolidation. The main reason to wait is maturity.
| Workflow concern | Traditional setup | Vite+ setup |
|---|---|---|
| Dev server | vite through package scripts | vp dev |
| Production build | Vite plus build config | vp build |
| Formatting | Prettier and .prettierrc | Oxfmt through vite.config.ts |
| Linting | ESLint and plugin config | Oxlint through vite.config.ts |
| Testing | Vitest config and scripts | vp test |
| Type checks and quality gates | Separate scripts | vp check |
| Node.js version management | NVM, FNM, or .nvmrc | vp env |
| Staged-file checks | Husky and lint-staged | Vite+ staged config, with hook setup as needed |
| Monorepo tasks | Turborepo, Nx, or custom scripts | vp run through Vite Task |
For a new Vite app, the Vite+ path is simpler. For a mature codebase, the traditional stack may still be safer if it depends on custom linting rules, deeply tuned formatting behavior, or existing monorepo infrastructure.
Current limitations to consider
Vite+ is promising, but it is not a risk-free drop-in replacement for every JavaScript project.
Before adopting it broadly, consider:
- Ecosystem maturity: Vite+ is still newer than the tools it consolidates
- ESLint compatibility: Oxlint supports many ESLint-compatible rules, but not every plugin or custom rule
- Formatting preferences: Oxfmt may not produce exactly the same output as Prettier in every case
- Framework assumptions: Vite+ is strongest in the Vite ecosystem, so framework-specific behavior should be tested
- Install size: Vite 8 is larger than Vite 7 because of added dependencies such as lightningcss and Rolldown
- Team workflow changes: Replacing familiar scripts with
vprequires documentation and onboarding
These are not reasons to avoid Vite+. They are reasons to test it like infrastructure rather than treating it as a cosmetic developer-experience upgrade.
Final thoughts
Vite+ makes a practical bet: JavaScript tooling is easier to maintain when the build tool, linter, formatter, test runner, task runner, and runtime manager are designed to work together.
For new Vite-based projects, that consolidation is immediately appealing. You get fewer config files, a smaller command surface, and a single vp check command for common quality checks. For teams experimenting with AI-assisted development, a consistent CLI workflow also makes it easier for coding agents to run, inspect, and fix project tasks.
For larger production apps, the better approach is gradual adoption. Test Vite+ on a branch, review the migration diff, compare formatting output, validate lint coverage, and make sure CI behaves the way your team expects.
Vite+ is not a magic replacement for every JavaScript tool. It is a serious attempt to reduce frontend tooling fragmentation by making Vite the entry point to a more integrated development workflow. For teams already invested in Vite, that direction is worth watching closely.
- #vite



Stop guessing about your digital experience with LogRocket
Get started for freeRecent posts:

Why are AI companies buying the teams behind your favorite dev tools?
AI companies are buying developer tools as coding agents turn runtimes, package managers, and linters into strategic infrastructure.
 Ikeh Akinyemi May 10, 2026 ⋅ 6 min read
AI-assisted development governance: A practical guide
Learn how AI-assisted development governance uses rules, agents, hooks, and protocols to help AI coding tools produce safer, more consistent code.
 Alexandra Spalato May 9, 2026 ⋅ 11 min read
How to build your first MCP server with Node.js
A step-by-step guide to building your first MCP server using Node.js, covering core concepts, tool design, and upgrading from file storage to MySQL.
 Elijah Asaolu May 5, 2026 ⋅ 9 min read
Using Next.js security headers to strengthen app security
Using security headers in your Next.js apps is a highly effective way to secure websites from common security threats.
 Kingsley Ubah May 4, 2026 ⋅ 11 min read View all posts
 Would you be interested in joining LogRocket's developer community?
Yea No ThanksJoin LogRocket’s Content Advisory Board. You’ll help inform the type of content we create and get access to exclusive meetups, social accreditation, and swag.













Comments
0 comment